Discover all the finishes of PANEL COMPOSITE

GLUED SYSTEM

Installation system that can be used for any type of façade without design limitations, since it does not use flanged trays, but only cut composite panels.
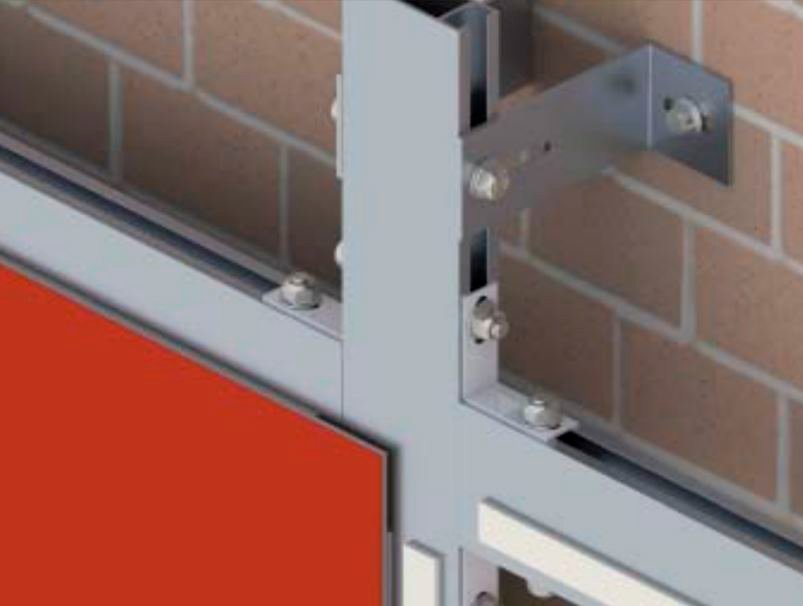
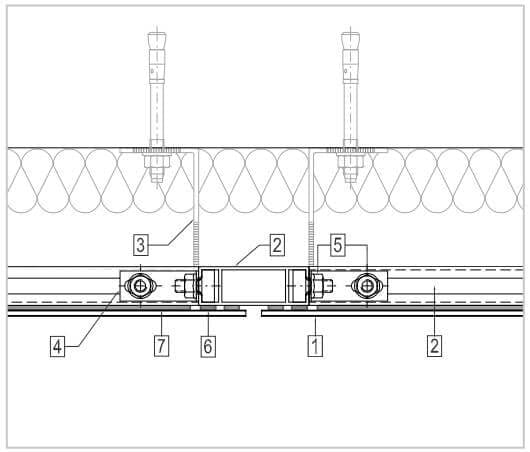
SISTEMA PEGADO

Construction details

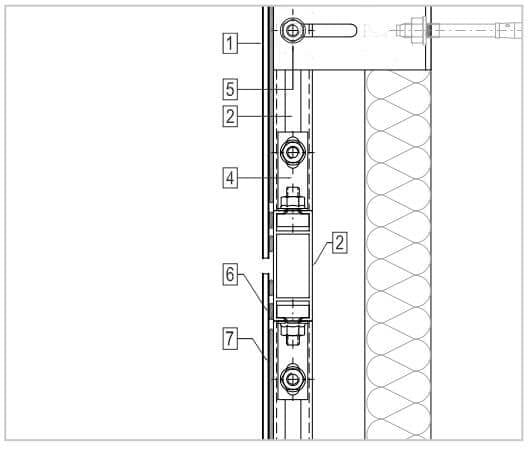
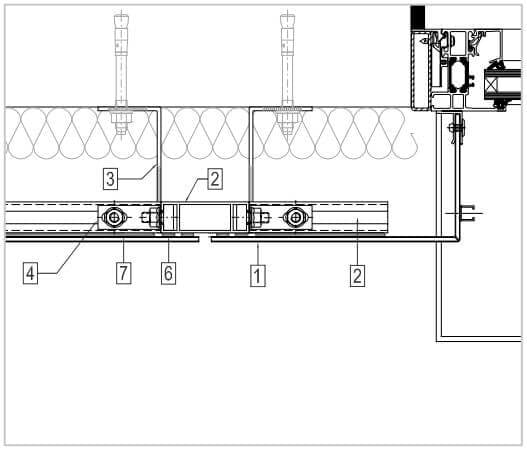
HORIZONTAL AND VERTICAL VIEW

Composite Sistema Pegado 1 Horizontal
Composite Sistema Pegado 2 Vertical

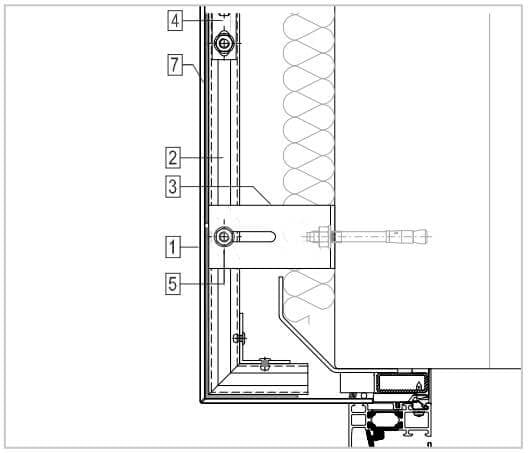
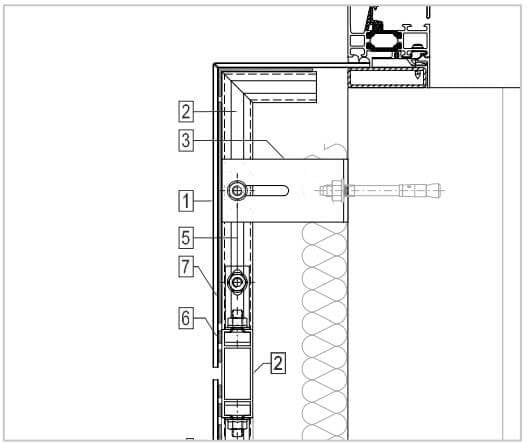
CROWNING / START-UP

Composite Sistema Pegado 4 Coronacion
Composite Sistema Pegado 4 Dintel 1

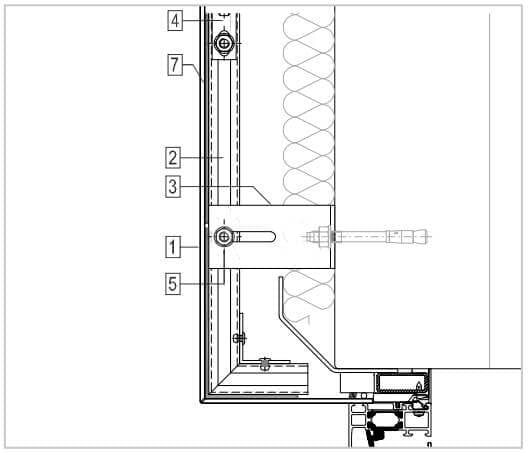
LINTEL / FLASHING

Composite Sistema Pegado 4 Dintel
Composite Sistema Pegado 6 Vierteaguas

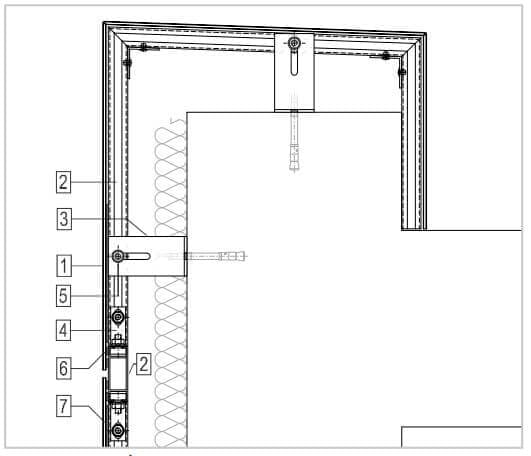
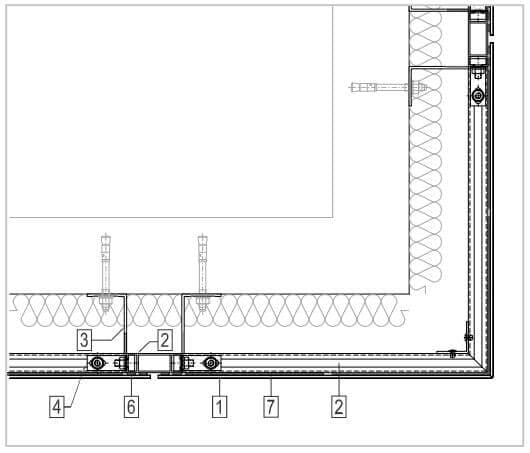
JAMB / CORNER

Composite Sistema Pegado 3 Jamba
Composite Sistema Pegado 7 Esquina

COMPOSITE BONDING PROCEDURE

  • Clean the panel in its bonding area with Sika Cleaner 205 and allow to dry for at least 10 minutes.
  • Prime the panel in its bonding area with Sikatack Panel Primer and allow to dry for a minimum of 15 minutes and no more than 1 hour before applying the adhesive on top.
  • Clean the battens with Sika Cleaner 205 and let it dry for at least 10 min. If the strip is made of wood, this operation should not be carried out. Maximum distance between battens 60 cm. unless otherwise specified by Sika or the manufacturer.

    Prime the strip with:

  • Wood filler: Sika Primer 1 or Sikatack Panel Primer.
  • Aluminum tracing: Sika Primer 210 T
  • Steel striping: Sika Primer 204
  • Other materials: Consult in each case

It is essential to respect the minimum drying time of each primer.
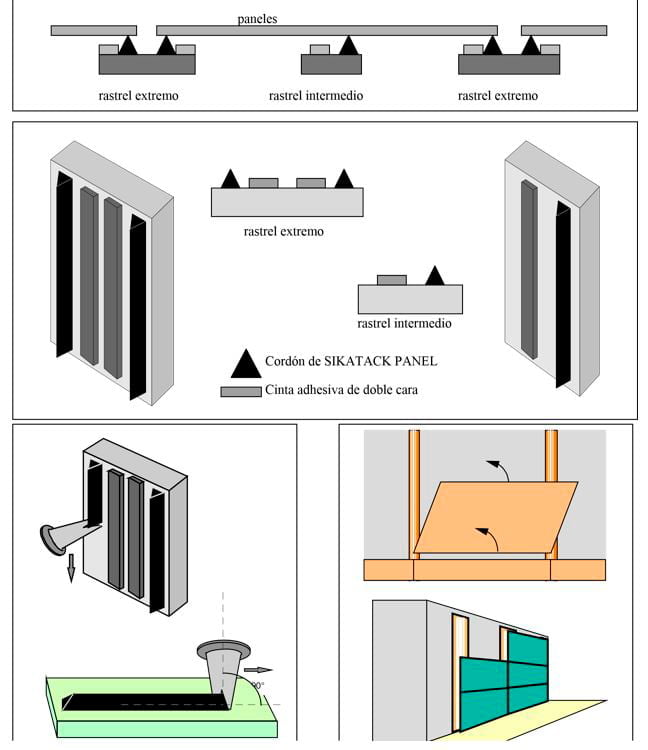
  • Place a continuous bead of Sikatack Panel 3 double-sided adhesive tape and do not remove the protective paper until the end so that it does not get dusty.
    Apply a continuous bead of Sikatack Panel adhesive to the side of the double-sided tape.
  • Remove the protective paper from the double-sided tape.
    Place the panel. To do this, overlap the panel in the area where it should be placed but without pressing. Adjust to its final position and then press firmly.
SIKA PEGADO